

Cookies help us deliver our services. By using our services, you agree to our use of cookies.
The Art of Gold Soldering: Tips for Seamless, Strong Jewelry Joints
Thursday, August 15, 2024
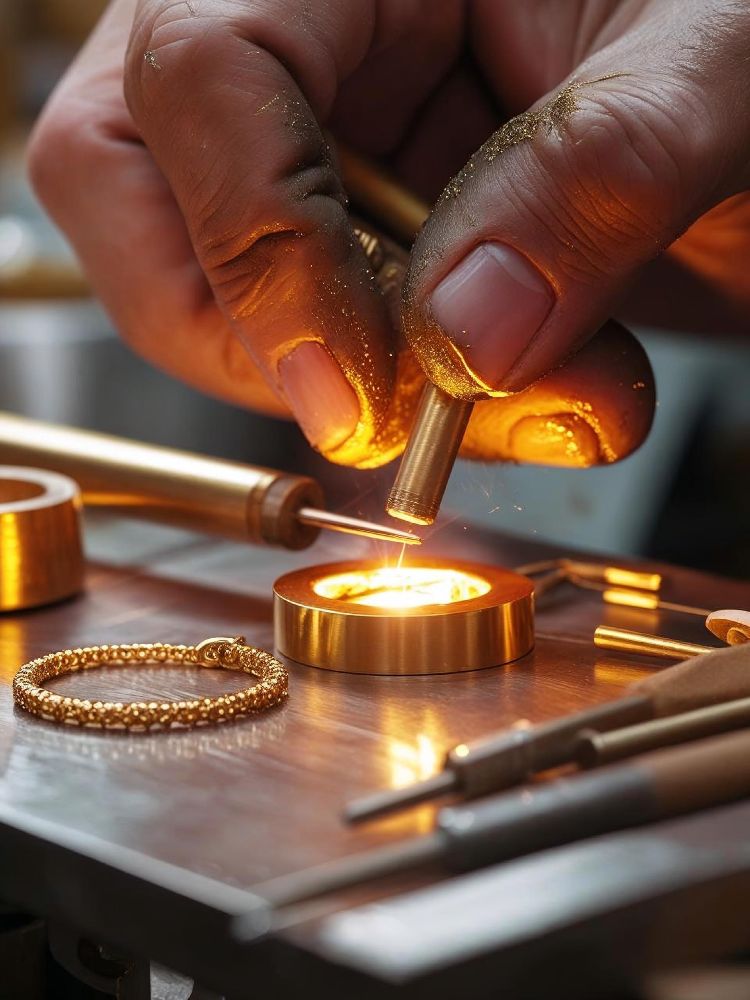 In the intricate world of goldsmithing, soldering is one of the most essential techniques. It’s the invisible backbone of fine jewelry—quietly holding pieces together while preserving the elegance of a seamless design.
But achieving a perfect solder joint requires more than just heat and metal. It demands precision, practice, and a deep understanding of how gold behaves under a torch. Whether you're fabricating a ring, assembling a pendant, or repairing a delicate chain, mastering gold soldering is a must for any serious jeweler.
Here’s how to solder gold like a pro—creating joints that are both strong and beautiful.
1. Choose the Right Solder
Not all gold solder is created equal. Solder comes in various karats and flow points, which determine how it behaves when heated.
Common gold solders:
-
Hard solder: Melts at the highest temperature; best used in the first stage of assembly.
-
Medium solder: Used in mid-stages without disturbing hard joints.
-
Easy solder: Melts quickly; ideal for final steps or small repairs.
💡 Tip: Always match your solder’s karat and color to the base metal (e.g., 18K yellow gold solder for 18K yellow gold work) to keep the joint nearly invisible.
2. Proper Fit is Key
Solder is not glue—it doesn't fill large gaps. To ensure a strong, long-lasting joint, the two pieces of gold must fit tightly together.
Best practices:
-
File edges flat and clean before soldering.
-
Use binding wire or clamps to hold components in perfect alignment.
-
Avoid forcing a gap, as the solder may pool instead of flow.
A flush fit allows capillary action to do its job, pulling molten solder cleanly through the seam.
3. Use the Right Flux
Flux prevents oxidation, helping solder flow freely and bond effectively.
Popular options:
-
Boric acid and alcohol dip: Great for preventing firescale.
-
Paste flux (e.g., Handy Flux): Ideal for small, detailed work.
Apply it evenly on all soldering surfaces. Without flux, your solder may ball up or fail to flow.
4. Control Your Heat
Soldering gold is all about heat control. Too much, and you risk melting your piece; too little, and the solder won’t flow.
Torch tips:
-
Use a small, focused flame for precision joints.
-
Always heat the metal, not the solder—this ensures the solder flows into the joint, not just over it.
-
Keep the flame moving to avoid overheating.
💡 Watch for the moment the solder flashes—this is your signal that the joint is complete.
5. Clean Thoroughly After Soldering
After soldering, your piece will likely be covered in flux residue and oxidation. Cleaning is essential for inspection and finishing.
Cleaning steps:
-
Quench in water immediately after soldering.
-
Soak in a pickle solution (e.g., sodium bisulfate) to remove oxidation.
-
Rinse, dry, and polish before moving to the next stage.
A clean joint will look nearly invisible and feel completely smooth to the touch.
Final Thoughts
Gold soldering is a blend of chemistry, craftsmanship, and control. When done correctly, the join is practically invisible—and the strength, uncompromising. Whether you're crafting bespoke pieces or restoring heirlooms, refining your soldering technique will elevate the quality of your gold jewelry.
With practice, patience, and precision, you’ll turn raw metal into lasting beauty—one joint at a time.
Leave your comment